> ## Documentation Index
> Fetch the complete documentation index at: https://docs.testsprite.com/llms.txt
> Use this file to discover all available pages before exploring further.

# Create Tests for New Projects

> Generate comprehensive test suites for a brand new project using TestSprite MCP Server.

## When to Use This

Use this guide when onboarding a project that has little or no automated tests. The MCP workflow will analyze your codebase, derive a normalized PRD, generate both frontend and backend test plans, create runnable tests, execute them, and produce reports.

## Prerequisites

* [Installed and configured](/mcp/getting-started/installation) TestSprite MCP in your IDE
* Application can run locally (frontend dev server or backend API)
* Basic test credentials if auth is required

## Quick Start (All-in-One)

<Frame>
  <img src="https://mintcdn.com/testspriteinc/etE5QHi14YOHx37z/images/term-generate.png?fit=max&auto=format&n=etE5QHi14YOHx37z&q=85&s=852939c4e3d8880459617ed860d58210" alt="generate" width="1906" height="895" data-path="images/term-generate.png" />
</Frame>

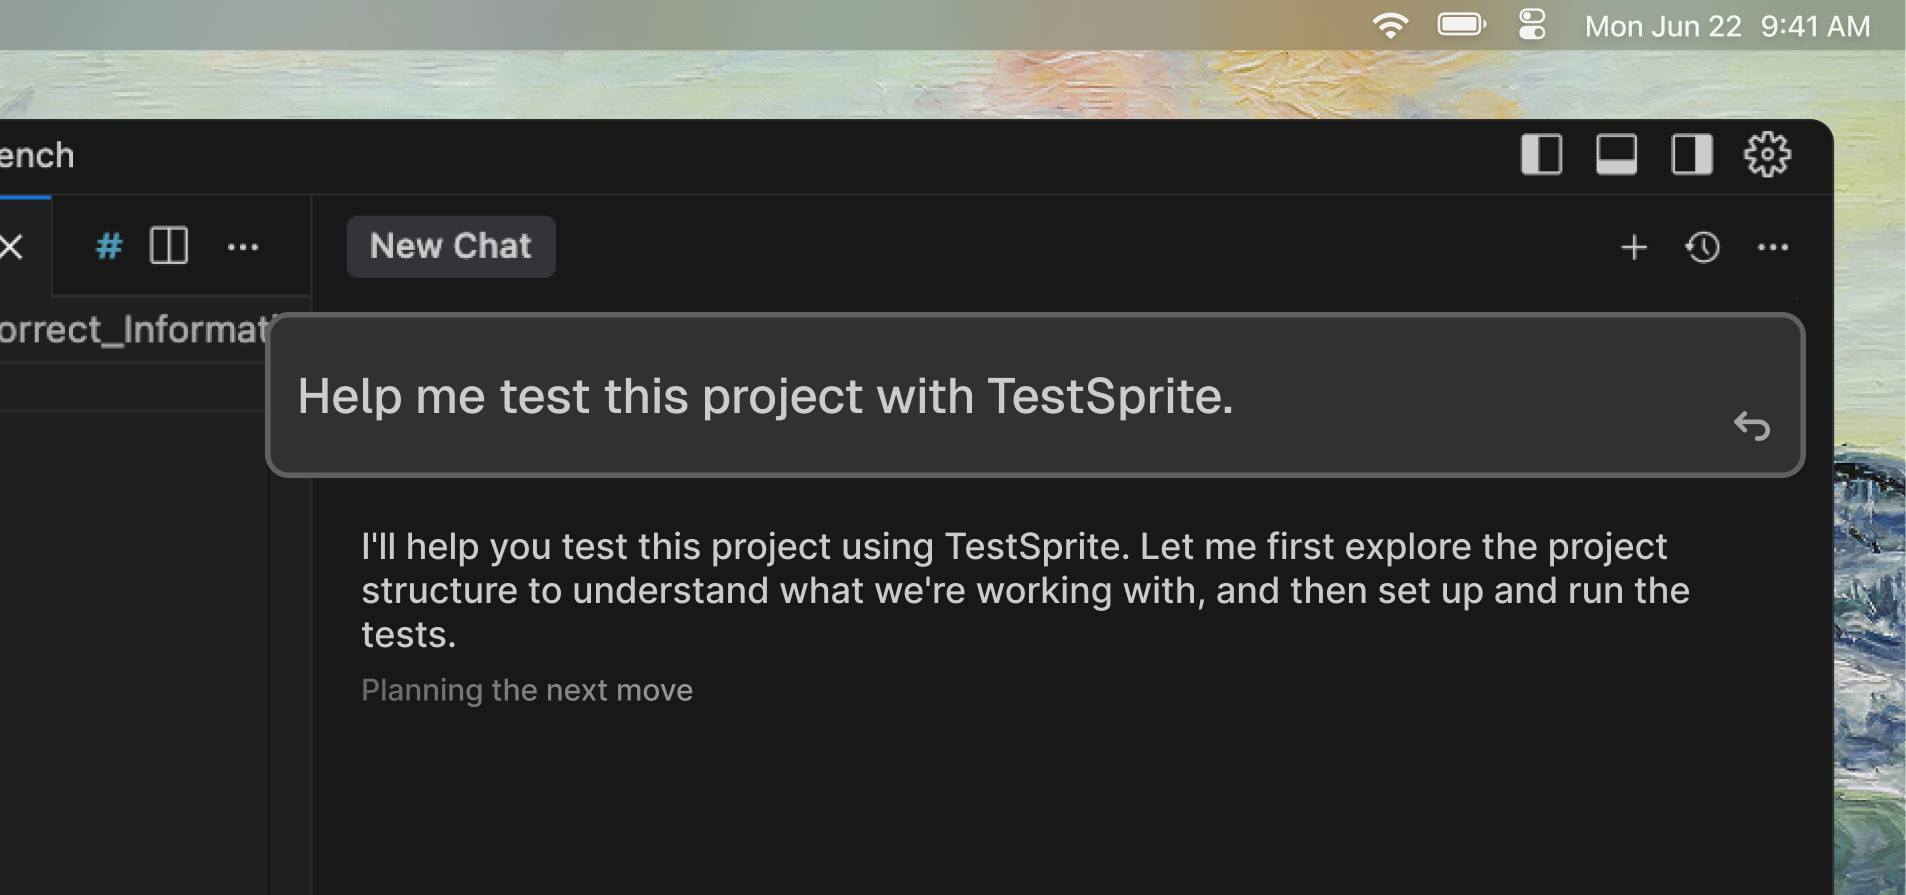
Ask your IDE assistant:

```text theme={null}
Help me test this project with TestSprite.
```

<Info>The assistant will orchestrate the full flow automatically.</Info>

## Complete Testing Workflow

TestSprite follows a systematic 8-step process to transform your code into thoroughly tested software:

<Card>
  ```mermaid theme={null}
  flowchart LR
      A["Bootstrap Environment<br/>Initialize testing setup"] --> B["Read User PRD<br/>Parse requirements"]
      A --> C["Analyze Code<br/>Understand codebase"]

      B --> D["Generate TestSprite PRD<br/>Create normalized requirements"]
      C --> D

      D --> E["Create Test Plans<br/>Design comprehensive tests"]
      E --> F["Generate Test Code<br/>Create executable tests"]
      F --> G["Execute Tests<br/>Run in cloud sandbox"]
      G --> H["Results & Analysis<br/>Generate detailed reports"]
      H --> I["AI Fixes Issues<br/>Apply automatic repairs"]
  ```
</Card>

### Step 1: Bootstrap Testing Environment

The AI calls `testsprite_bootstrap_tests` to initialize the testing environment.

<Info>Learn more about bootstrap configuration: [First Test: Configuration](/mcp/getting-started/first-test#step-3%3A-configuration-required)</Info>

<Frame>
  <img src="https://mintcdn.com/testspriteinc/ex3lblqbetJSa-ak/images/bootstrap.png?fit=max&auto=format&n=ex3lblqbetJSa-ak&q=85&s=c5a547df16ea718b96e346b2e74bac2a" alt="bootstrap" width="1906" height="253" data-path="images/bootstrap.png" />
</Frame>

**Process:**

1. **Project Detection**: Identifies project type (`frontend` or `backend`)
2. **Port Discovery**: Finds running applications and their ports
3. **Configuration Portal**: Opens TestSprite configuration interface
4. **Scope Definition**: Determines testing scope (`codebase` for full project)

<CodeGroup>
  ```javascript Configuration expandable theme={null}
  testsprite_bootstrap_tests({
    localPort: 5173, // or your port
    type: "frontend", // or "backend"
    projectPath: "/absolute/path/to/your/project",
    testScope: "codebase" // test entire project
  })
  ```

  ```json Sample Configuration expandable theme={null}
  {
    "projectType": "frontend",
    "localPort": 5173,
    "testScope": "codebase",
    "needLogin": true,
    "credentials": {
      "username": "test@example.com",
      "password": "testpassword123"
    }
  }
  ```
</CodeGroup>

### Step 2: Read User PRD

TestSprite reads the Product Requirements Document (PRD) that you upload to understand your product goals and requirements.

<Frame>
  <img src="https://mintcdn.com/testspriteinc/ReL5WaX10_vGG0UW/images/term-prd.png?fit=max&auto=format&n=ReL5WaX10_vGG0UW&q=85&s=b223e5f34a2b55bfa54e829de86d3db0" alt="prd" width="3812" height="1790" data-path="images/term-prd.png" />
</Frame>

**Process:**

1. **PRD Upload**: Reads the PRD file you uploaded during configuration
2. **Requirement Parsing**: Extracts user stories, acceptance criteria, and functional requirements
3. **Goal Understanding**: Identifies primary product objectives and user needs
4. **Scope Definition**: Determines what features should be tested

### Step 3: Code Analysis & Summary

The AI calls `testsprite_generate_code_summary` to analyze your codebase.

<Frame>
  <img src="https://mintcdn.com/testspriteinc/ex3lblqbetJSa-ak/images/code-summary.png?fit=max&auto=format&n=ex3lblqbetJSa-ak&q=85&s=b2289ba93e4c86805acf56a270925383" alt="summary" width="1906" height="253" data-path="images/code-summary.png" />
</Frame>

**Analysis Process:**

1. **Structure Mapping**: Identifies files, folders, and dependencies
2. **Framework Detection**: Recognizes React, Vue, Angular, Node.js, etc.
3. **Feature Extraction**: Understands implemented functionality
4. **Architecture Analysis**: Maps component relationships
5. **Security Assessment**: Identifies potential vulnerabilities


<CodeGroup>
  ```javascript Tool Call theme={null}
  testsprite_generate_code_summary({
    projectRootPath: "/absolute/path/to/your/project"
  })
  ```

  ```json Expandable Generated Output expandable theme={null}
  {
    "tech_stack": [
      "React",
      "TypeScript",
      "Material-UI (MUI)",
      "React Router",
      "Vite",
      "Node.js"
    ],
    "features": [
      {
        "name": "Authentication System",
        "description": "User login/logout functionality with protected routes and authentication context",
        "files": ["src/App.tsx", "src/pages/Login.tsx"]
      },
      {
        "name": "Product Catalog",
        "description": "Display products in a grid layout with filtering, search, and product browsing capabilities",
        "files": ["src/pages/ProductCatalog.tsx"]
      }
    ]
  }
  ```
</CodeGroup>

### Step 4: Generate TestSprite Normalized PRD

The AI calls `testsprite_generate_standardized_prd` to create a standardized, normalized Product Requirements Document.

<Frame>
  <img src="https://mintcdn.com/testspriteinc/ex3lblqbetJSa-ak/images/generate-prd.png?fit=max&auto=format&n=ex3lblqbetJSa-ak&q=85&s=ae9bac30c64916026f010dddb74f5cdf" alt="prd" width="1906" height="253" data-path="images/generate-prd.png" />
</Frame>

<Tip>**TestSprite Innovation** - TestSprite invented this normalized PRD format, a standardized structure that ensures consistent test generation across any project type, regardless of your original PRD format. Learn more in [Key Terms](/mcp/concepts/key-terms#normalized-prd).</Tip>

**PRD Components:**

1. **Product Overview**: High-level description and goals
2. **Core Goals**: Primary objectives and user needs
3. **Key Features**: Main functionality and capabilities
4. **User Flows**: Step-by-step user journeys
5. **Validation Criteria**: Test requirements and acceptance criteria

<CodeGroup>
  ```javascript Tool Call theme={null}
  testsprite_generate_standardized_prd({
    projectPath: "/absolute/path/to/your/project"
  })
  ```

  ```json Expandable Generated PRD Structure expandable theme={null}
  {
    "meta": {
      "project": "Your Application Name",
      "version": "1.0.0",
      "prepared_by": "Generated by TestSprite"
    },
    "product_overview": "High-level description of your application's purpose and functionality.",
    "core_goals": [
      "Primary objective of your application",
      "Key user needs the application addresses",
      "Main business or functional goals"
    ],
    "key_features": [
      "Core feature 1 with implementation approach",
      "Authentication and authorization system",
      "Main user interface components",
      "Data management and persistence"
    ],
    "user_flow_summary": [
      "User entry point and initial interaction",
      "Primary user workflows and actions",
      "Administrative and management functions"
    ],
    "validation_criteria": [
      "Functional requirements validation",
      "Security and access control verification",
      "User interface and experience validation"
    ],
    "code_summary": {
      "tech_stack": ["Framework", "Language", "Tools"],
      "features": [
        {
          "name": "Feature Name",
          "description": "Feature functionality description",
          "files": ["src/components/Feature.tsx"]
        }
      ]
    }
  }
  ```
</CodeGroup>

### Step 5: Create Test Plans

The AI calls `testsprite_generate_frontend_test_plan` or `testsprite_generate_backend_test_plan` based on project type.

<Frame>
  <img src="https://mintcdn.com/testspriteinc/ex3lblqbetJSa-ak/images/generate-testplan.png?fit=max&auto=format&n=ex3lblqbetJSa-ak&q=85&s=78f6ec43027b6cd90853c35b7089e31e" alt="testplan" width="1906" height="253" data-path="images/generate-testplan.png" />
</Frame>

**Test Plan Components:**

1. **Test Cases**: Detailed scenarios with steps
2. **Categories**: Functional, UI/UX, Security, Performance
3. **Priorities**: High, Medium, Low based on user impact
4. **Prerequisites**: Setup requirements for each test
5. **Expected Results**: Success criteria and validation points

<CodeGroup>
  ```javascript Frontend UI/Business Flows theme={null}
  testsprite_generate_frontend_test_plan({
    projectPath: "/absolute/path/to/your/project",
    needLogin: true
  })
  ```

  ```javascript Backend API/Integration theme={null}
  testsprite_generate_backend_test_plan({
    projectPath: "/absolute/path/to/your/project"
  })
  ```

  ```json Expandable Generated Test Plan expandable theme={null}
  [
    {
      "id": "TC001",
      "title": "Login success with valid test credentials",
      "description": "Verify that users can log in successfully using the hardcoded test credentials",
      "category": "functional",
      "priority": "High",
      "steps": [
        {
          "type": "action",
          "description": "Navigate to the login page"
        },
        {
          "type": "action",
          "description": "Input valid hardcoded username"
        },
        {
          "type": "action",
          "description": "Input valid hardcoded password"
        },
        {
          "type": "action",
          "description": "Click the login button"
        },
        {
          "type": "assertion",
          "description": "Verify the user is redirected to the product catalog page"
        },
        {
          "type": "assertion",
          "description": "Verify authentication context reflects logged-in status"
        }
      ]
    }
  ]
  ```
</CodeGroup>

### Step 6: Generate Executable Test Code

The AI calls `testsprite_generate_code_and_execute` to create production-ready test code based on the test plans.

<Frame>
  <img src="https://mintcdn.com/testspriteinc/ex3lblqbetJSa-ak/images/generate-execute-code.png?fit=max&auto=format&n=ex3lblqbetJSa-ak&q=85&s=81b4276d217fa86407b36c889c4def24" alt="code" width="1906" height="253" data-path="images/generate-execute-code.png" />
</Frame>

**Test Code Generation Process:**

1. **Framework Selection**: Chooses appropriate testing framework (Playwright, Cypress, Jest)
2. **Test Structure**: Creates organized test suites and files
3. **Helper Functions**: Generates reusable utility functions
4. **Data Setup**: Creates test data and fixtures
5. **Configuration**: Sets up test environment configuration

<CodeGroup>
  ```javascript Tool Call expandable theme={null}
  testsprite_generate_code_and_execute({
    projectName: "your-project-name",
    projectPath: "/absolute/path/to/your/project",
    testIds: [], // empty = all tests
    additionalInstruction: "Focus on critical user journeys first"
  })
  ```

  ```python Expandable Generated Test Code Example expandable theme={null}
  # TC001_Login_success_with_valid_test_credentials.py
  import asyncio
  from playwright import async_api

  async def run_test():
      pw = None
      browser = None
      context = None

      try:
          # Start a Playwright session in asynchronous mode
          pw = await async_api.async_playwright().start()

          # Launch a Chromium browser in headless mode
          browser = await pw.chromium.launch(
              headless=True,
              args=[
                  "--window-size=1280,720",
                  "--disable-dev-shm-usage",
                  "--ipc=host",
                  "--single-process"
              ],
          )

          # Create a new browser context
          context = await browser.new_context()
          context.set_default_timeout(5000)

          # Open a new page in the browser context
          page = await context.new_page()

          # Navigate to your target URL
          await page.goto("http://localhost:5174", wait_until="commit", timeout=10000)

          # Navigate to the login page
          frame = context.pages[-1]
          elem = frame.locator('xpath=html/body/div/header/div/a[3]').nth(0)
          await page.wait_for_timeout(3000)
          await elem.click(timeout=5000)
          # ... more test steps
  ```
</CodeGroup>

### Step 7: Execute Tests

TestSprite runs the generated test code in secure cloud environments.

<Frame>
  <img src="https://mintcdn.com/testspriteinc/3tFsKENc_ol65zBe/images/execute-cloud.png?fit=max&auto=format&n=3tFsKENc_ol65zBe&q=85&s=3bef7980b9d8cb0b9a08b3ae3a876431" alt="cloud" width="2888" height="1720" data-path="images/execute-cloud.png" />
</Frame>

**Cloud Execution Process:**

1. **Sandbox Creation**: Isolated testing environment
2. **Dependency Installation**: Installs required packages
3. **Test Execution**: Runs all generated tests
4. **Result Collection**: Gathers results, screenshots, logs
5. **Report Generation**: Creates comprehensive test report

### Step 8: Analyze Results & Reports

TestSprite generates comprehensive test reports with detailed analysis, error descriptions, and actionable fix recommendations.

<Frame>
  <img src="https://mintcdn.com/testspriteinc/ReL5WaX10_vGG0UW/images/report.png?fit=max&auto=format&n=ReL5WaX10_vGG0UW&q=85&s=6f41d1c8052954278de3bd5814e7a736" alt="report" width="3460" height="1790" data-path="images/report.png" />
</Frame>

<br />

<Tabs>
  <Tab title="What You Get">
    * **Detailed test results** with pass/fail status for each test case
    * **Error analysis** explaining why tests failed
    * **Fix recommendations** with specific steps to resolve issues
    * **Coverage metrics** showing overall project health
    * **Requirement breakdown** organized by feature areas
  </Tab>

  <Tab title="Files Generated">
    * Test files and reports under `testsprite_tests/`
    * `test_results.json` - Structured test results
    * `report_prompt.json` - AI-readable report with fix recommendations
    * HTML reports for human review
  </Tab>
</Tabs>

**Test Report Structure:**

<Accordion title="View Detailed Report Structure">
  **Basic Information** - Every report starts with essential details:

  * **Project Name** - The name of your application
  * **Test Date** - When the tests were run
  * **Version** - Which version was tested
  * **Summary** - Quick overview of results

  **Test Results by Feature** - The report groups tests by your app's main features. Each feature section shows:

  **Feature Overview:**

  * **What it does** - Simple description of the feature
  * **How many tests** - Number of tests run for this feature

  **Each Test Shows:**

  * **Test ID** - Unique identifier like "TC001"
  * **What was tested** - Clear description like "Login with valid password"
  * **Result** - ✅ **Passed** or ❌ **Failed**
  * **Priority** - High, Medium, or Low importance
  * **What went wrong** - Detailed error explanation (if failed)
  * **How to fix it** - Specific recommendations for repairs

  **Overall Results Summary:**

  **Quick Stats:**

  * **73% of features tested** - How much of your app was covered
  * **56% of tests passed** - Overall success rate
  * **Critical issues found** - Most important problems to fix

  **Feature-by-Feature Breakdown:**

  | Feature Area    | Tests Run | ✅ Passed | ❌ Failed |
  | --------------- | --------- | -------- | -------- |
  | User Login      | 2         | 1        | 1        |
  | Product Display | 2         | 2        | 0        |
  | Admin Panel     | 3         | 0        | 3        |
  | Shopping Cart   | 3         | 3        | 0        |
</Accordion>

### Step 9: AI Fixes Issues

When you request fixes with **"Help me fix the codebase based on these test results"**, your IDE AI assistant:

<Card>
  ```mermaid theme={null}
  flowchart LR
      A[Reads Test Results] --> B[Analyzes Test Report]
      B --> C[Examines Error Details]
      C --> D[Identifies Root Causes]
      D --> E[Generates Targeted Fixes]
      E --> F[Applies Changes]
      F --> G[Validates Fixes]
  ```
</Card>

<Tip>**TestSprite's Role** - TestSprite provides the analysis and recommendations, while your IDE's AI assistant implements the actual fixes.</Tip>

<Tabs>
  <Tab title="Process">
    1. **Reads Test Results**: Reviews `testsprite_tests/tmp/test_results.json` for detailed failure data
    2. **Analyzes Test Report**: Processes `testsprite_tests/tmp/report_prompt.json` for context and recommendations
    3. **Examines Error Details**: Reviews stderr messages and test visualizations
    4. **Identifies Root Causes**: Determines underlying issues causing test failures
    5. **Generates Targeted Fixes**: Creates code changes based on TestSprite's recommendations
    6. **Applies Changes**: Modifies your codebase automatically
    7. **Validates Fixes**: Re-runs tests to verify solutions
  </Tab>

  <Tab title="Example Fix Application">
    The AI assistant automatically applies fixes based on TestSprite's recommendations. Here's a real example showing how a missing delete button was identified and added to fix a failing test.

    <CodeGroup>
      ```javascript Before expandable theme={null}
      // Missing delete button in admin panel
      const AdminProductCard = ({ product, onDelete }) => {
        return (
          <div className="product-card">
            <h3>{product.name}</h3>
            <p>{product.description}</p>
            <div className="actions">
              <button className="edit-btn">Edit</button>
            </div>
          </div>
        );
      };
      ```

      ```javascript After expandable theme={null}
      // AI-generated fix
      const AdminProductCard = ({ product, onDelete }) => {
        return (
          <div className="product-card">
            <h3>{product.name}</h3>
            <p>{product.description}</p>
            <div className="actions">
              <button className="edit-btn">Edit</button>
              {/* AI added this button to fix failing test */}
              <button
                id="admin-delete-btn"
                className="delete-btn"
                onClick={() => onDelete(product.id)}
              >
                Delete
              </button>
            </div>
          </div>
        );
      };
      ```
    </CodeGroup>
  </Tab>
</Tabs>

## Best Practices

<AccordionGroup>
  <Accordion title="Before Testing">
    * Ensure all applications are running on specified ports
    * Prepare test credentials for auth flows
    * Update README with clear project description
    * Clean up any development artifacts
  </Accordion>

  <Accordion title="During Testing">
    * Review generated PRD for accuracy
    * Examine test plan coverage
    * Monitor test execution progress
    * Note any configuration adjustments needed
  </Accordion>

  <Accordion title="After Testing">
    * Analyze test results thoroughly
    * Understand failure patterns
    * Apply fixes systematically
    * Document lessons learned
    * Re-run tests to validate fixes
  </Accordion>
</AccordionGroup>

## Next Steps

<Columns cols={2}>
  <Card title="Create Tests for New Changes" href="/mcp/core/create-tests-new-feature">
    Test diff-scoped changes
  </Card>

  <Card title="Modify or Update Tests" href="/mcp/core/modify-tests">
    Adjust existing tests
  </Card>

  <Card title="Continuous Monitoring" href="/mcp/core/continuous-monitoring">
    Integrate into CI/CD
  </Card>

  <Card title="Test Types & Lifecycle" href="/mcp/concepts/test-type-lifecycle">
    Understand what we test
  </Card>

  <Card title="Healing & Observability" href="/mcp/concepts/healing-observability">
    Learn about auto-healing
  </Card>
</Columns>
