

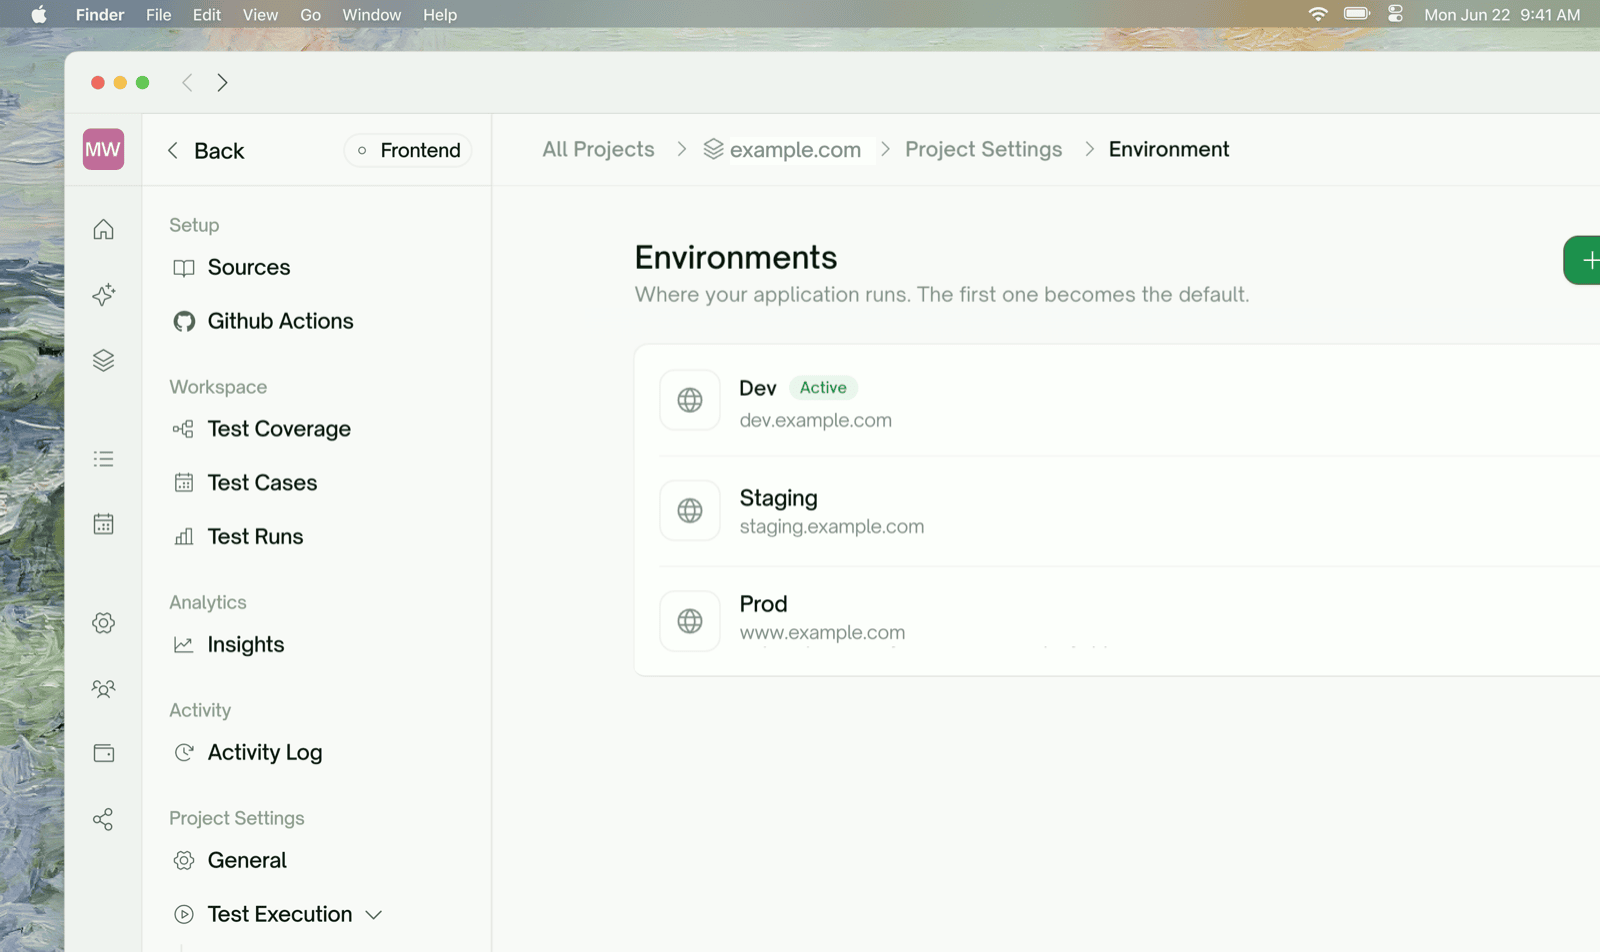
What an Environment Is
An environment is one place your application runs. Every project has at least one, and each bundles what differs between deployments:
Tests describe what to verify; the environment supplies where and with which values. That’s what lets one suite cover several deployments.
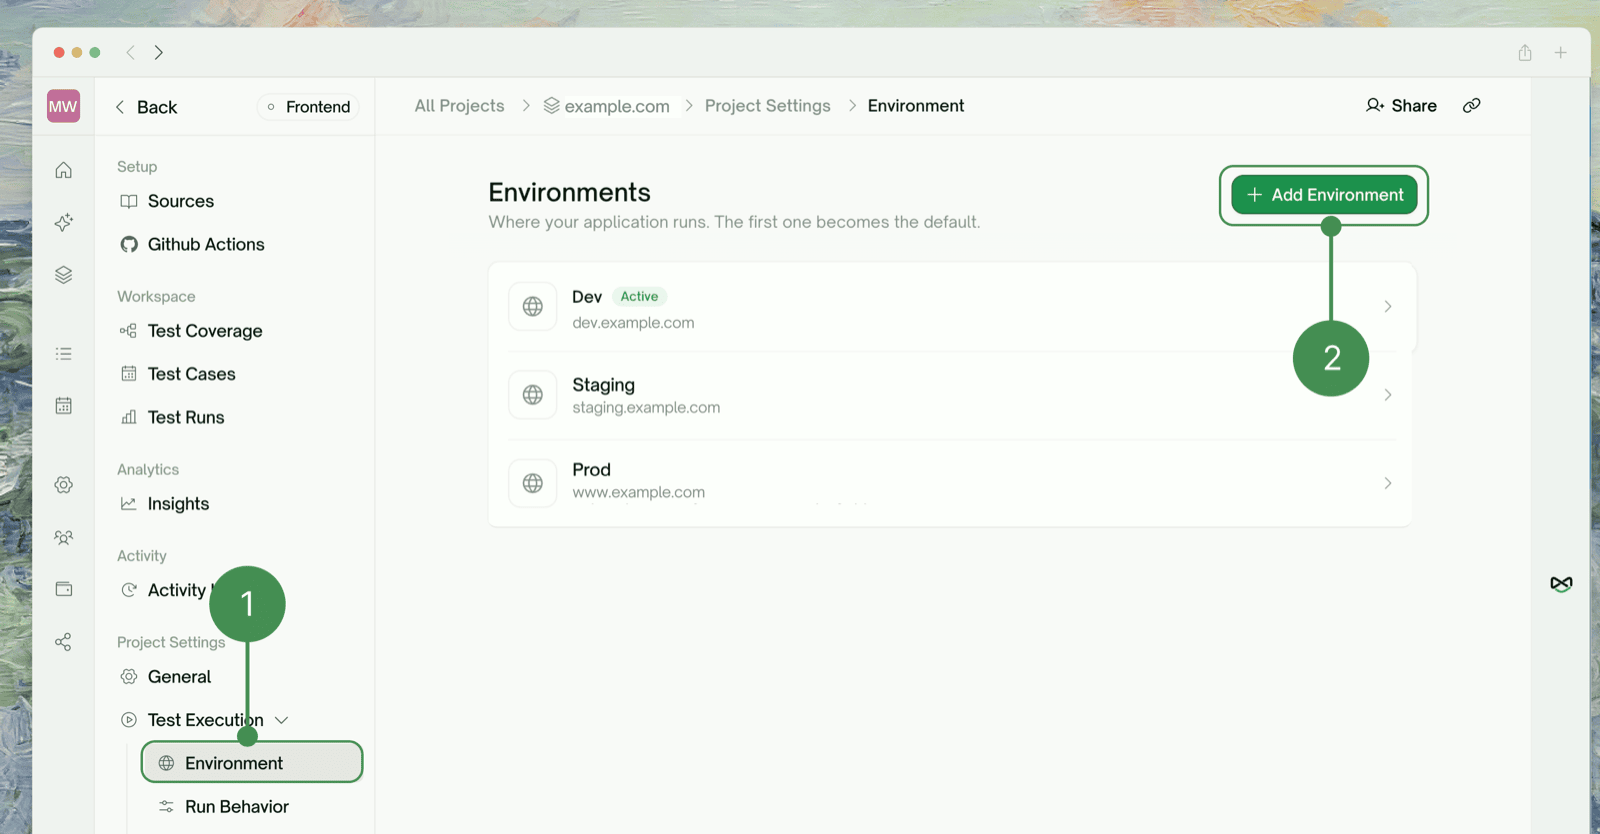
Environments live in Project Settings → Test Execution → Environment. Click any environment in the list to edit it.
Creating an Environment
Click Add Environment in the top-right of the Environments page and fill in the deployment’s details, typically one entry each fordev, staging, and production.
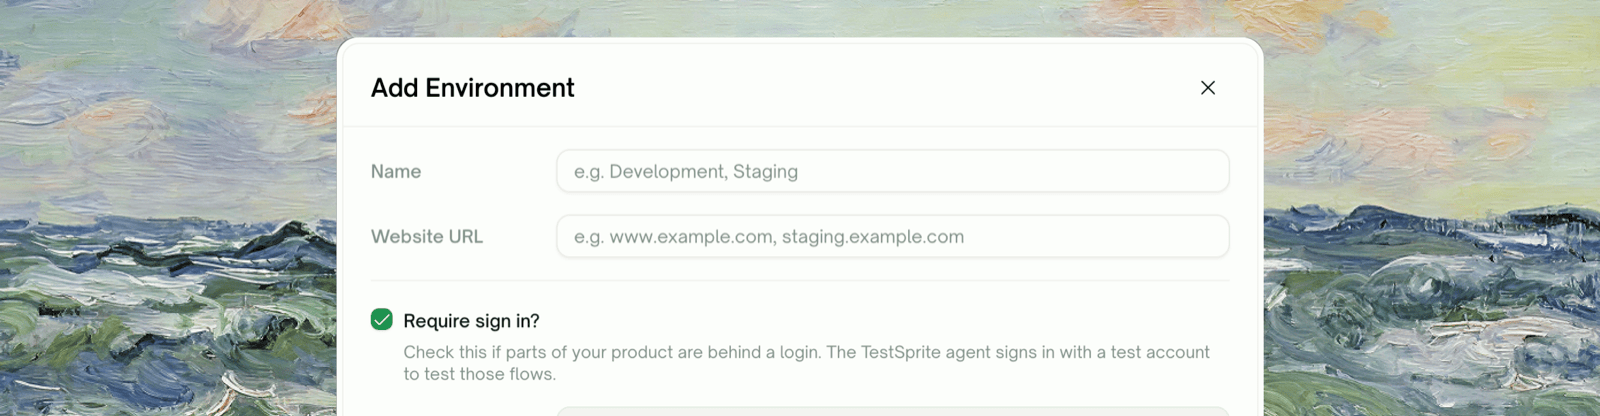
- Authentication sets how tests authenticate against this deployment:
None,Basic,Bearer Token, orAPI Key. You can refine it per endpoint later (see below). - Auto-refresh Login can be set up right away if the deployment’s tokens expire; TestSprite then fetches a fresh token before every run. See Auto-Auth.
- The first environment a project gets becomes the Active one automatically.
Environment Variables (Custom Variables)
Where they’re defined
Open an environment and scroll to Custom Variables. Click Add Variable and enter aKEY = value pair. Variables are defined per environment, so the same key usually holds a different value in each:

How tests reference them
You don’t paste values into test cases. When TestSprite generates test code, values from the environment are stamped asVAR_{key} placeholders (for example VAR_{TENANT_ID}) and resolved from the currently selected environment right before each test runs. So:
- Switching environments never requires regenerating tests. Every run re-resolves the placeholders.
- A variable a test references must exist in every environment you run against, or the placeholder has nothing to resolve to.
Environment variables are static configuration you define (a tenant ID, a support email). Dynamic Variables are values captured at run time from one test’s response and fed into another (a freshly created
user_id).Per-Endpoint Authentication and Headers (Backend)
A backend environment also has the Customize Header panel, the same tool you used when reviewing the API doc. It sets authentication and extra request headers per endpoint, for APIs where a login route is public, an admin group needs a different key, or every call needs anx-org-id.
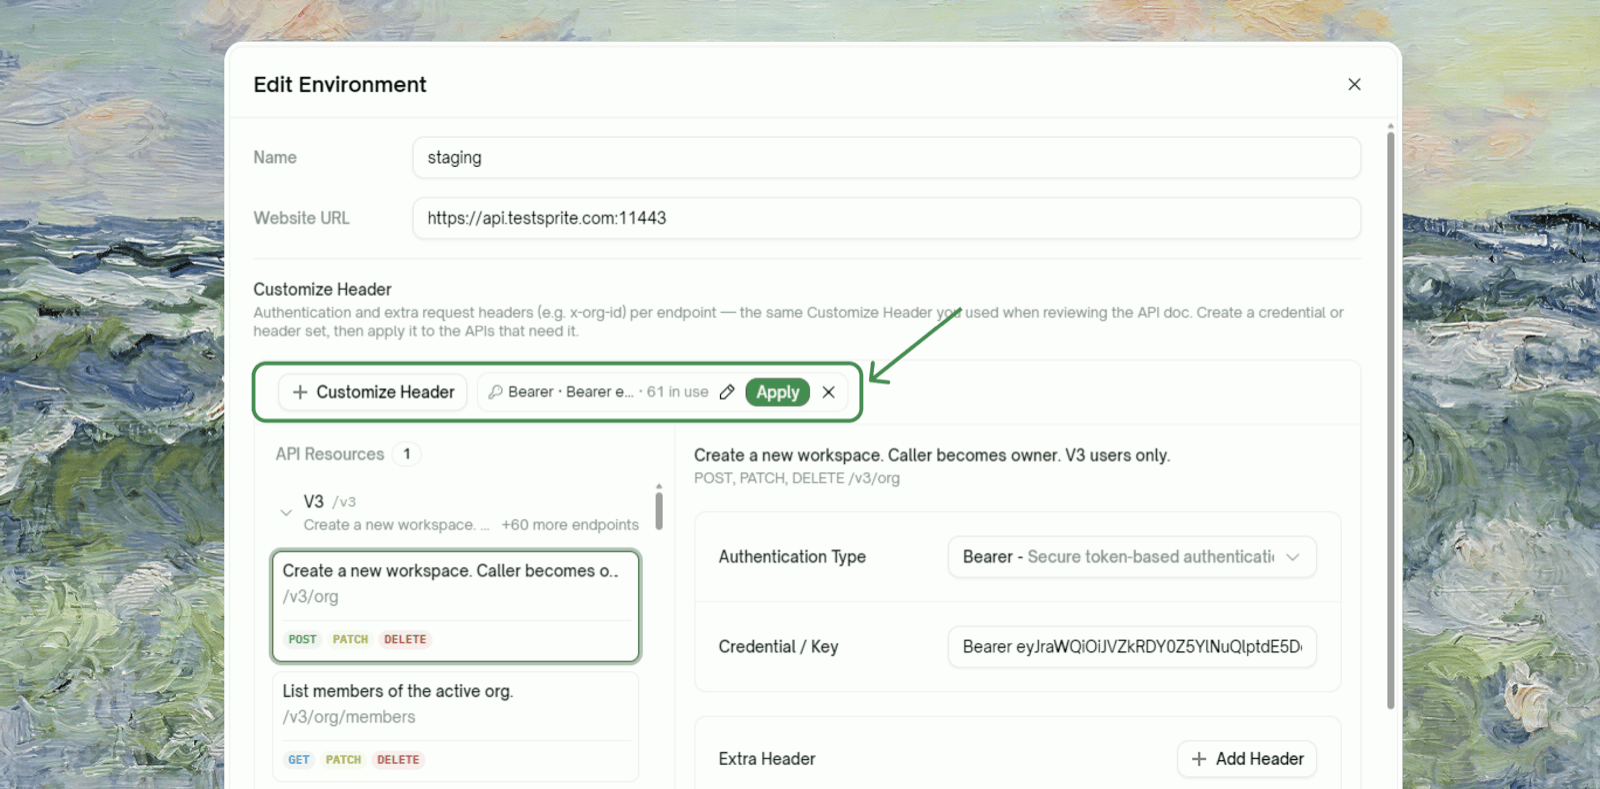
- Authentication Type
- Extra Header
A credential set: 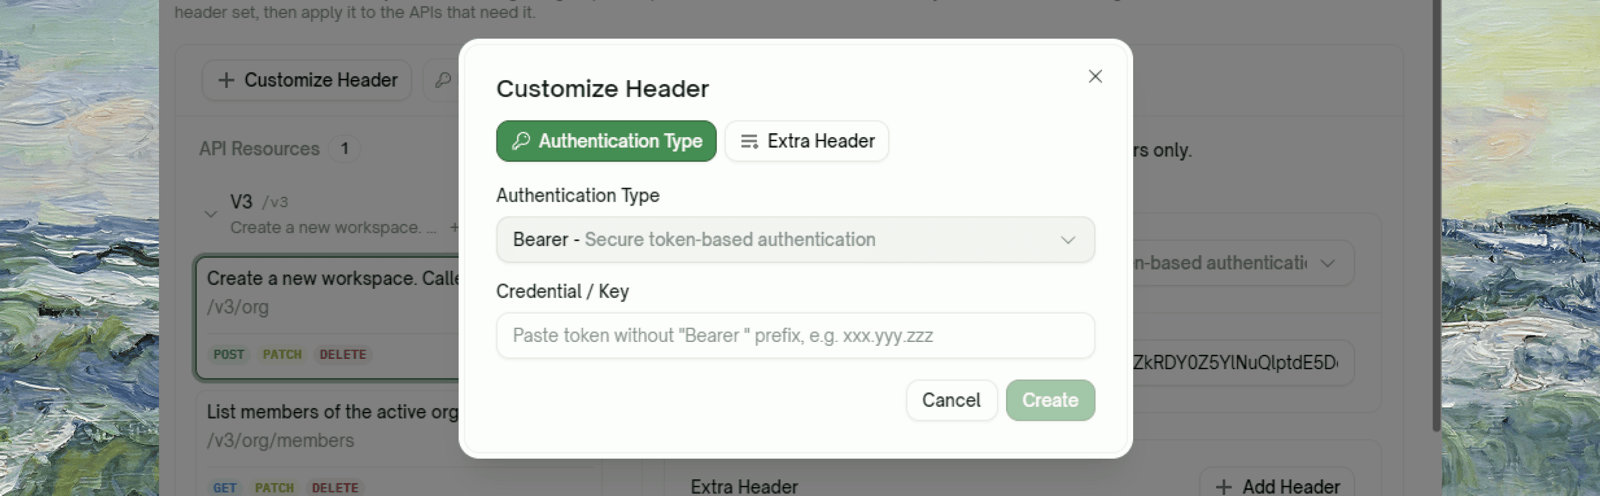
Bearer / API Key / Basic plus the credential value. Endpoints without one fall back to the environment-level authentication chosen at creation.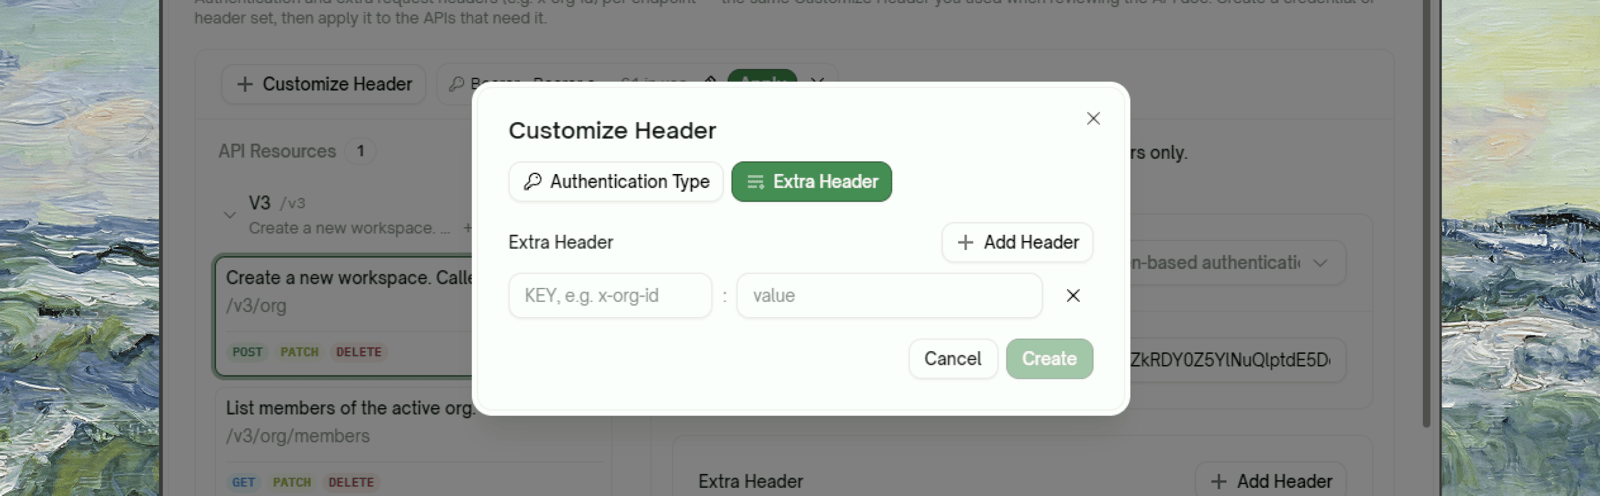
61 in use). Apply opens an endpoint picker, and selecting an endpoint in the list shows exactly which credential and headers its tests will send.
Managing Multiple Environments
- One environment is always Active (marked with a badge). Runs you trigger from the portal execute against the Active environment.
- Open an environment and click Set As Active to switch.
- Every project keeps at least one environment; the last one can’t be deleted.
- Deleting an environment doesn’t affect existing tests; they resolve against whichever environment is Active when they next run.
Running the Same Suite Against Different Environments
Because tests store placeholders, “run against staging instead” is a configuration change, not a test change:1
Ad-hoc runs
Set the target environment as Active, then trigger the run. Every URL, credential, and 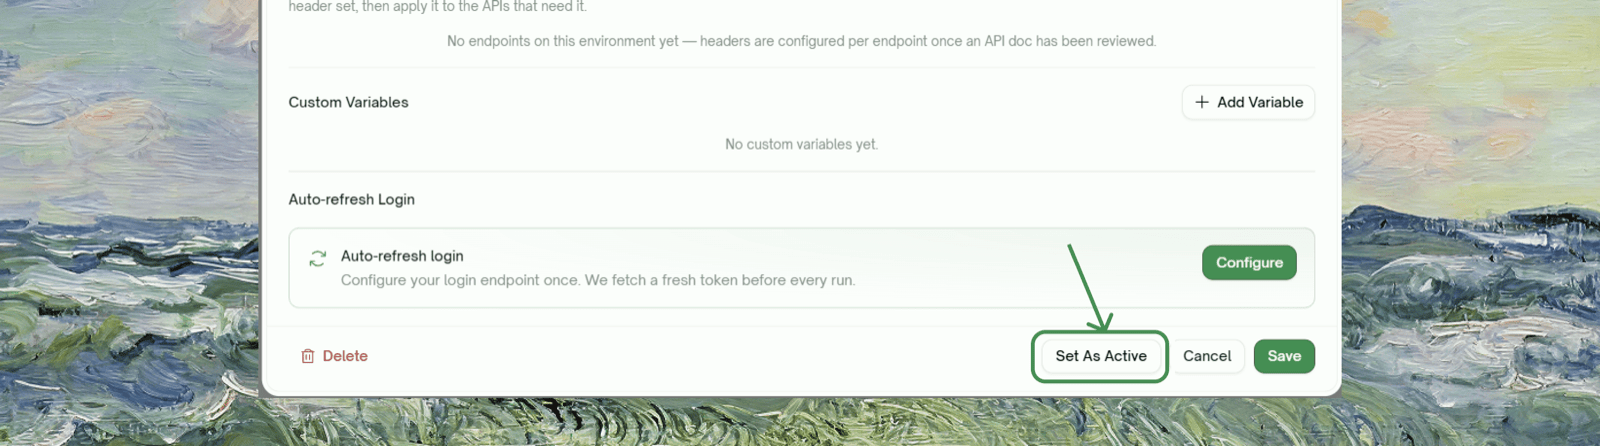
VAR_{key} resolves from that environment.2
Test Lists and schedules
A Test List can pin an environment per project it contains, and a schedule runs its list with those pins. Your nightly can run against staging while your Active environment stays on dev.
What Belongs Where
Rule of thumb: identity and secrets go in the authentication configuration; everything else that varies per deployment goes in variables or the URL field.
A token in a custom variable technically works, but it loses masking, export redaction, and one-click rotation, and anyone opening the environment dialog can read it.
Related
Auto-Auth
Fetch a fresh token before every run
Dynamic Variables
Runtime values that flow between tests
Test Lists
Curated suites with per-project environment pins